
Roo Code (VS Code, Legacy Compatibility Guide)
A beginner-friendly guide to installing Roo Code 3.54.0, configuring an X-AIO OpenAI-compatible provider, and running your first task.
Read this first: Roo Code is no longer maintained
Roo Code officially ended maintenance and archived the extension on May 15, 2026. Its VS Code Marketplace page may still show an Install button, but bug fixes, security updates, and long-term availability are no longer guaranteed. This page exists only to help users who still need the legacy Roo Code extension complete a one-time compatibility setup. New users should consider ZooCode or Cline first. Do not use an unmaintained extension directly with a production repository or a project that contains confidential information.
This guide is based on hands-on testing on macOS with Roo Code 3.54.0. Button names are generally the same on Windows and Linux; replace Cmd with Ctrl in keyboard shortcuts.
What you need
- VS Code
1.84or later. Roo Code 3.54.0 specifies this as its minimum version. - A practice folder you can open. Do not start with an important project, so an accidental edit cannot affect valuable files.
- An active session on the X-AIO API Key Management page.
- Available credits on an X-AIO Tokens Plan.
Roo Code is an agent that runs inside VS Code. It can read your workspace, propose file changes, run commands, and carry out actions after you approve them. It is neither a built-in VS Code feature nor a model; you must connect it to a model provider first.
Optional: Verify your account and credits first
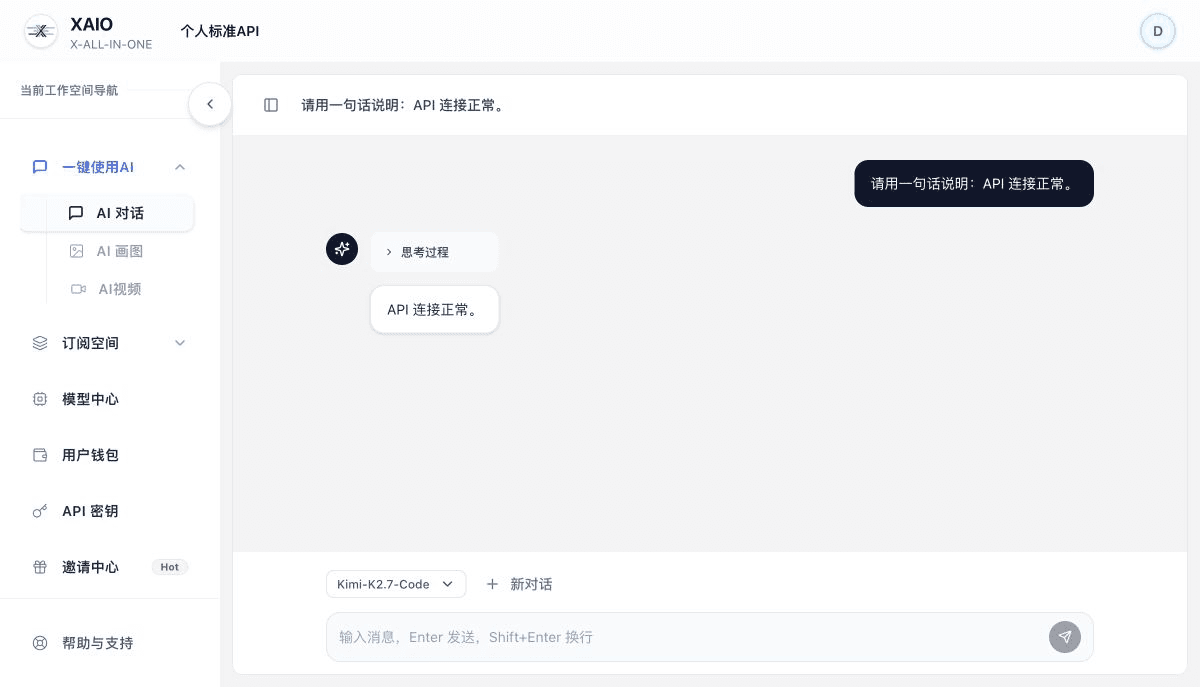
If you are unsure whether your account has credits, open One-click AI -> AI Chat in the X-AIO sidebar, select a currently available model, and send a short message. A successful response confirms that your account, model, and credits are available. If this page already reports insufficient balance, check the Tokens Plan Subscription Overview and resolve the credit issue before configuring Roo Code.
The following screenshot shows a successful test with Kimi-K2.7-Code on August 26, 2026. Success here only confirms that chat works on the X-AIO platform; Roo Code still requires the separate verification later in this guide.
1. Install VS Code and Roo Code
Install VS Code
Download and install the version for your operating system from the Visual Studio Code website. After opening VS Code, select File -> Open Folder and open an empty practice folder. If VS Code asks whether you trust the folder, you can trust the practice directory you just created.
Install from the Extensions Marketplace
- Click the Extensions icon in the Activity Bar on the left, or press
Cmd+Shift+Xon macOS (Ctrl+Shift+Xon Windows or Linux). - Search for
Roo Code. - Verify that the publisher is RooVeterinaryInc / Roo Code, then click Install. Do not install an extension with a similar name from another publisher.
- When installation is complete, the Roo Code icon appears in the Activity Bar. Reload VS Code if prompted.
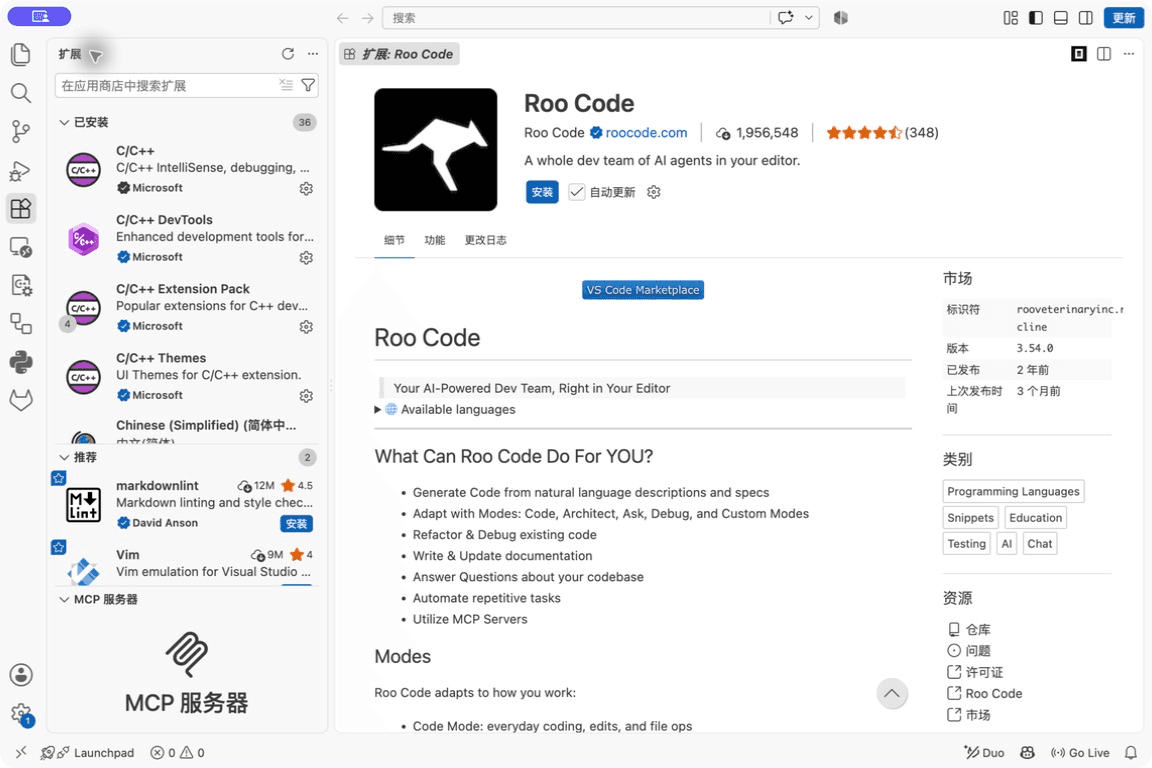
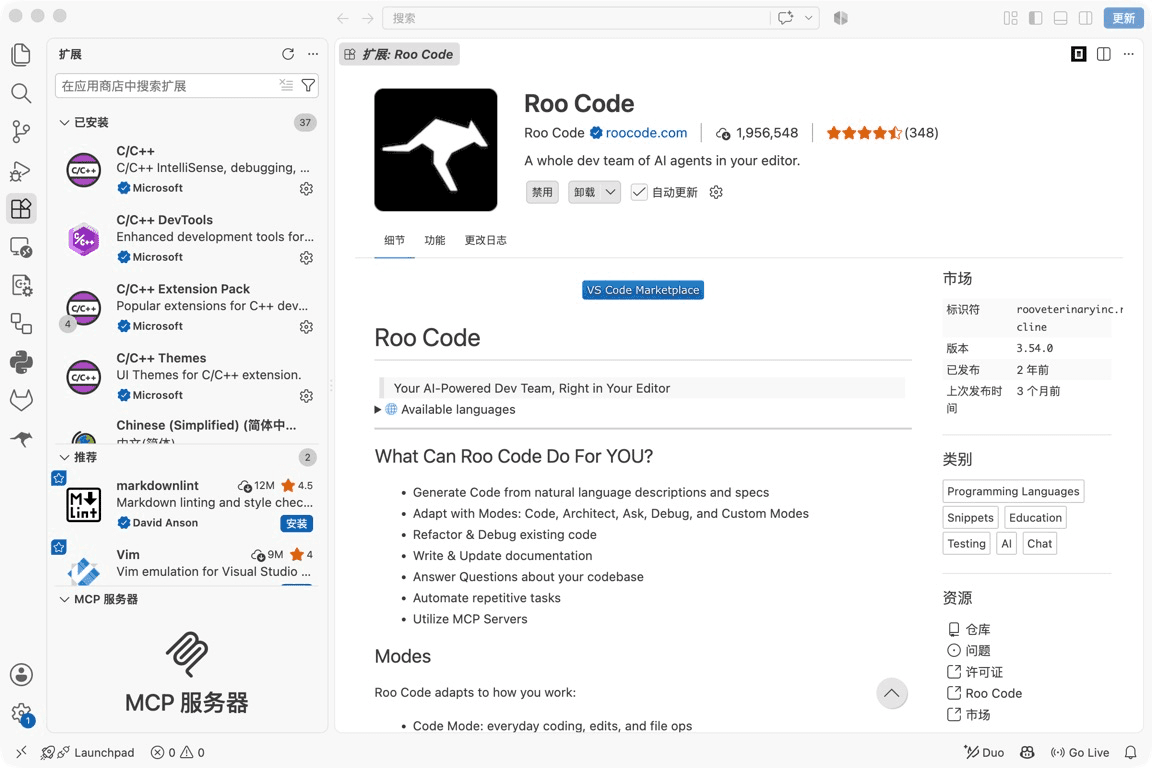
The installed extension page shows the extension ID rooveterinaryinc.roo-cline and version 3.54.0. Installation is complete only when the Disable and Uninstall buttons appear.
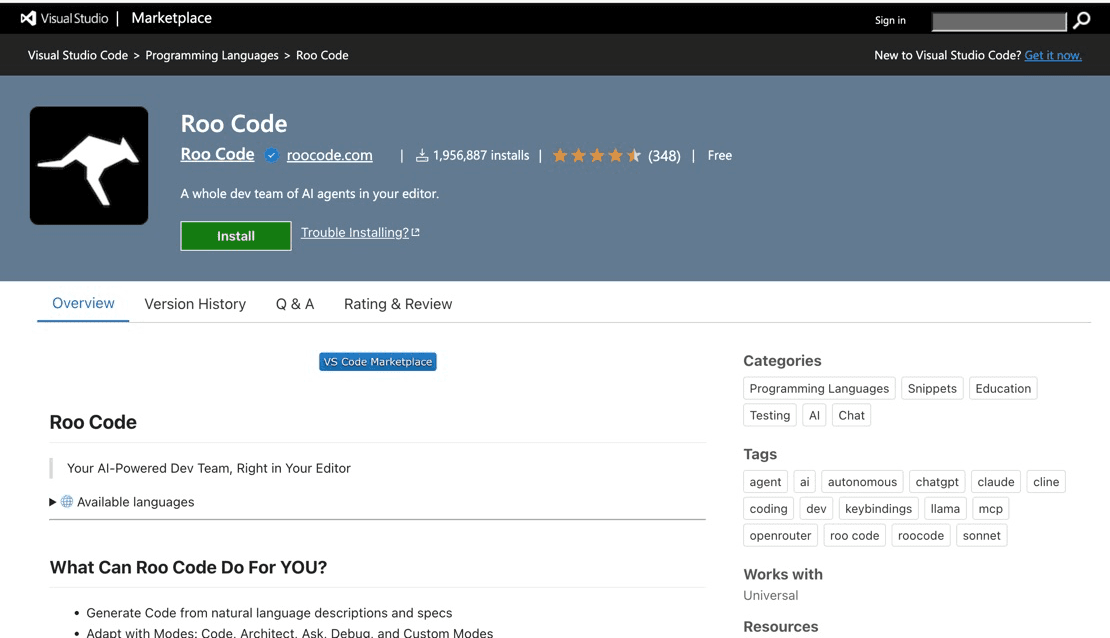
If the Marketplace install button does not work, download the official .vsix from Roo Code GitHub Releases, then choose Install from VSIX from the ... menu on the Extensions page. This fallback installs only the legacy version; it does not change the fact that the project is no longer maintained.
Open Roo Code for the first time
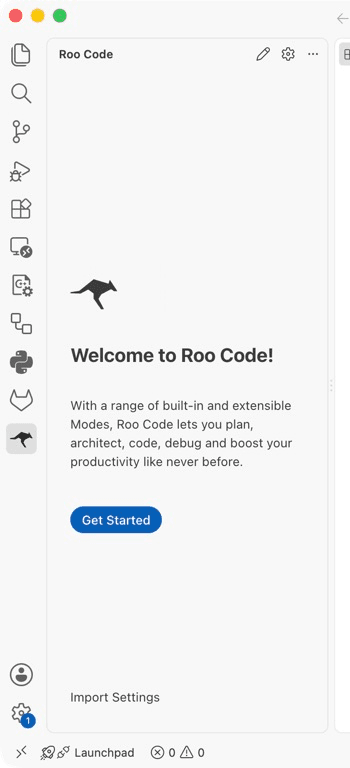
Click the Roo Code icon in the Activity Bar to open the Welcome to Roo Code! page. You do not need to register a Roo Code account. Click Get Started to configure a provider. Import Settings is only for users with an existing Roo configuration; imported files may contain an API key, so never import an unfamiliar file.
2. Create a dedicated API key in X-AIO
An API key is an access credential. Create a separate, short-lived key for this tutorial or test so that you can revoke it independently later. Do not reuse a production key.
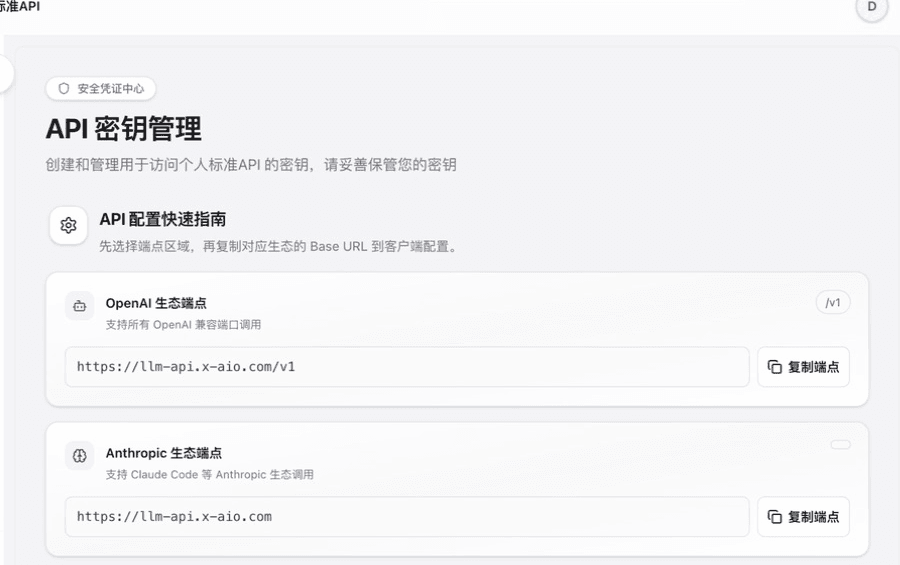
- Open X-AIO API Key Management and verify that the workspace in the upper-left corner is the Personal Standard API workspace you intend to use.
- Note the OpenAI-compatible endpoint on the page:
https://llm-api.x-aio.com/v1. This is Roo Code's Base URL. Do not enter the complete/chat/completionspath. - Click Create New Key.
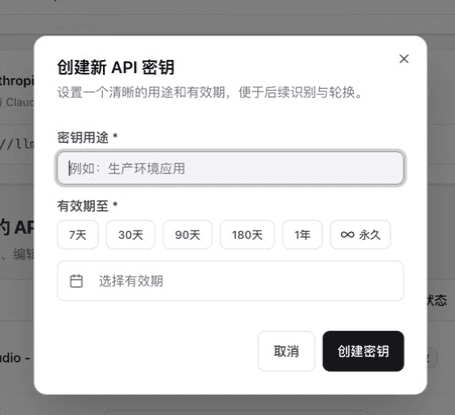
- Enter an easy-to-recognize name under Key Purpose, such as
Roo Code Beginner Guide. - Select 90 days, verify the expiration date shown on the page, then click Create Key.
- Return to the key list, find the purpose name you just entered, and click Copy API Key in that row. Do not copy masked text such as
sk-xxxx...xxxxfrom the list.
Keep the key secure
Store the complete key only in a password manager or VS Code's secure storage. Do not put it in Markdown, screenshots, terminal history, settings.json, a Git repository, or chat history. If you suspect exposure, immediately delete the old key from the same row and create a new time-limited key.
3. Select OpenAI Compatible in Roo Code
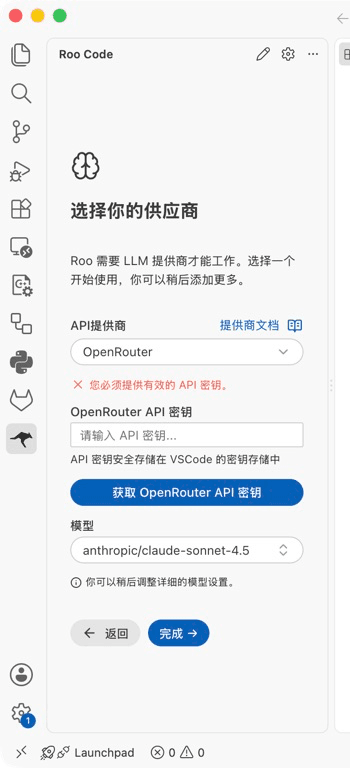
The first-run wizard may default to OpenRouter, which is not the X-AIO configuration. Switch providers as follows:
-
Click Get Started on the Roo Code welcome page.
-
Open the API Provider drop-down, enter
OpenAI Compatiblein the search field, and select the option with that name. -
Enter the following in Base URL:
https://llm-api.x-aio.com/v1 -
Paste the complete key you just copied into API Key. The field masks it with dots. Roo Code stores it in VS Code's Secret Storage rather than in plain-text settings.
-
Wait for the model drop-down to load. Prefer a model from the live list that supports native OpenAI tool calling. Do not copy an outdated model ID from an old tutorial. If the list is empty, check the base URL and key first; use Custom Model only when the provider explicitly supplies an ID.
Review the detailed settings after the wizard
Click Done at the bottom of the wizard, then click Settings in the upper-right corner of the Roo Code panel. If you create a profile, consider naming it X-AIO so that it is easy to select later.
Configure the OpenAI Compatible profile according to the model's capabilities:
| Setting | Recommendation | When to change it |
|---|---|---|
| Enable streaming | Leave enabled | Disable only when the provider explicitly does not support streaming |
| Include max output tokens | Leave enabled | Disable if the provider rejects this parameter |
| R1 / reasoning format | Disabled by default | Enable only when the reasoning model explicitly requires it |
| Image Support | Check against the selected model's capabilities; the UI may enable it by default | Disable for non-vision models and enable only for vision models |
| Max Tokens, Context Window | Prefer the values populated by the model list | For manual configuration, enter only provider-published values; -1 for Max Tokens means the server decides |
| Computer Use, Prompt Caching, pricing | Disabled or blank by default | Configure only when both the model and provider explicitly support them |
Click Save first and verify that no error appears, then click Done or go back to leave Settings. If you fill in fields without saving, the configuration may not take effect after you leave the page.
4. Verify the connection with a minimal task
Run these tests in an empty practice folder before opening a real project.
Start with a read-only check
-
Click the Roo Code icon, then click New Task.
-
Select Ask or Architect from the mode drop-down. These modes are better for learning about the workspace before making broad file changes.
-
Enter:
Check whether the current workspace is empty. Tell me only which files you can see and what you recommend doing next. Do not create, modify, or delete any files, and do not run commands. -
A text response from Roo confirms that the key, base URL, and model have completed at least one request.
Then perform a reversible write test
After confirming that only the practice folder is open, switch to Code mode and enter:
Create hello.txt in the current workspace with exactly one line: Roo Code configured successfully.
Do not run commands. Show me each proposed action and wait for my approval before continuing.
Roo may request permission to read, write, or run a command. Review each path, change, and command:
- Click Reject if the path is wrong, the proposed content is unclear, or the command has side effects.
- If the action is correct, approve only that individual action. Do not enable every auto-approval permission at once.
- Finally, verify in the VS Code Explorer that
hello.txtexists and contains exactly one line.
Setup is successful only after Roo responds, the file appears in the correct workspace, and its contents match the request.
5. Troubleshooting
| Symptom | Resolution |
|---|---|
401 or Invalid API Key | Click Copy API Key again in the target row instead of copying the masked value. Verify that the key has not expired and that the correct workspace is selected. |
404 or endpoint not found | Enter only https://llm-api.x-aio.com/v1 as the base URL. Do not repeat /v1/v1 or append /chat/completions. |
| The model list is empty | Wait a few seconds and retry. Check the network, base URL, and key. If necessary, use only a custom Model ID explicitly supplied by the provider. |
| Model not found | Select a model again from the live drop-down list instead of using a fixed name from an old tutorial. |
| Tool calls fail or files cannot be created | Roo Code supports only native OpenAI tool calling. Switch to a model that explicitly supports tool calls. |
| The request times out or receives no response | Start with a smaller read-only request and check the network and credits. Then review the View -> Output -> Roo Code log. |
| The Roo icon is missing | Restart VS Code and verify that the extension is enabled. Check the publisher and version on the extension page. |
| Roo cannot modify the workspace | Verify that the correct folder is open and that you trusted it. Use Ask mode first to confirm the path. |
6. Migrate from Roo Code
Because Roo Code has been archived, new users should not build long-term workflows around it. Existing settings can be migrated to the community-maintained ZooCode: select Export in Roo Code Settings, then select Import Settings in ZooCode. The exported file may contain an API key. Delete the temporary file immediately after migration and recheck all credentials before using them in a public environment.
Official status references:
- Official Roo Code documentation (the home page displays Extension Shutdown)
- Roo Code GitHub repository (archived and read-only)
- VS Code Marketplace listing (may still display the legacy install button)