
Cline (VS Code)
A beginner-friendly guide to installing Cline, creating an X-AIO API key, selecting a model, and starting your first conversation.
Cline is a coding assistant that runs in VS Code. After installing the extension, you need to enter your X-AIO API key and endpoint before you can start a conversation.
This guide has been retested on macOS. Button names are generally the same on Windows and Linux; replace Cmd with Ctrl in keyboard shortcuts.
Test with an empty folder first
The first time you use Cline, open only a new, empty folder. Do not start with a production project, private repository, or directory that contains secrets. This guide tests only a basic conversation and does not allow Cline to read or modify files.
Before you begin
- VS Code is installed.
- You have an empty practice folder, such as
xaio-cline-demo. - You are signed in to the X-AIO API Key Management page.
- You have an X-AIO workspace with available credits.
1. Install the official Cline extension
- In VS Code, select File -> Open Folder and open the empty practice folder. If VS Code asks whether you trust the authors of the files in this folder, verify that the path points to the empty folder you just created, then trust it.
- Click the Extensions icon in the Activity Bar on the left, or press
Cmd+Shift+X. - Search for
Cline. - Verify that the extension is named Cline, the publisher is the verified Cline / cline.bot, and the extension ID is
saoudrizwan.claude-dev. - Click Install. When installation is complete, the Cline icon appears in the Activity Bar.
Do not install Cline Chinese, Cline (Nightly), or another extension with a similar name.
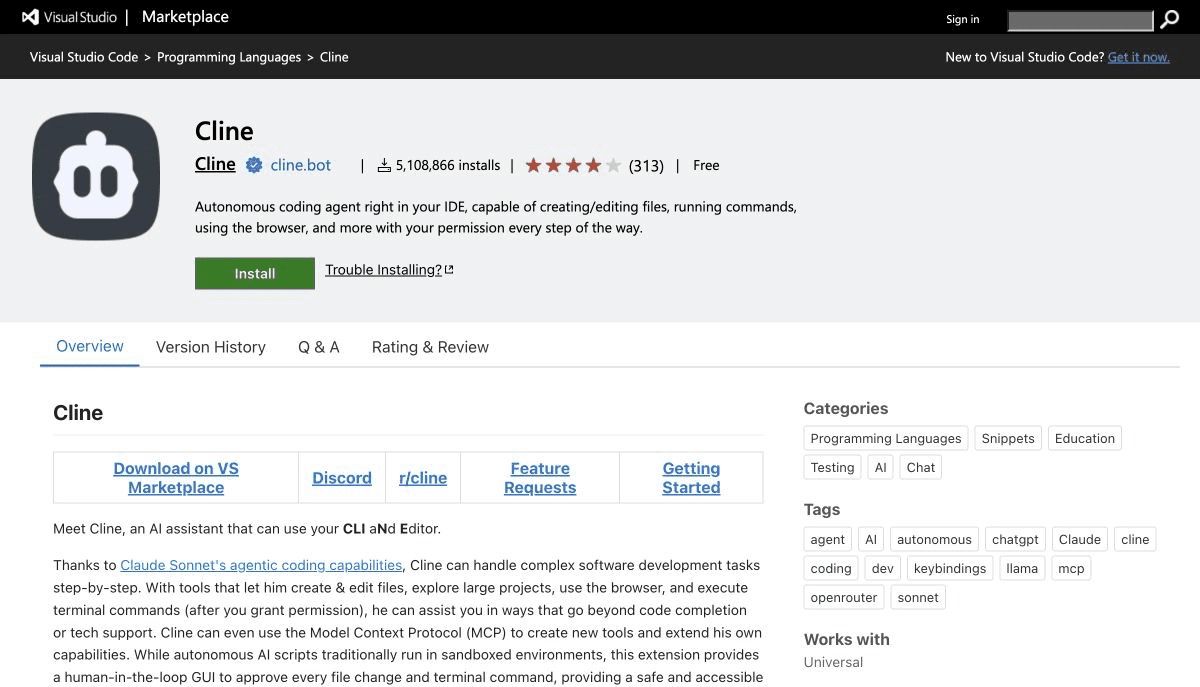
Open Cline in the Visual Studio Marketplace
2. Create a dedicated X-AIO API key
An API key is an access credential. Create a separate, time-limited key for Cline so that you can review its usage or revoke it independently later.
-
Open X-AIO API Key Management.
-
Switch to a workspace with available credits.
-
Note the OpenAI-compatible endpoint shown on the page:
https://llm-api.x-aio.com/v1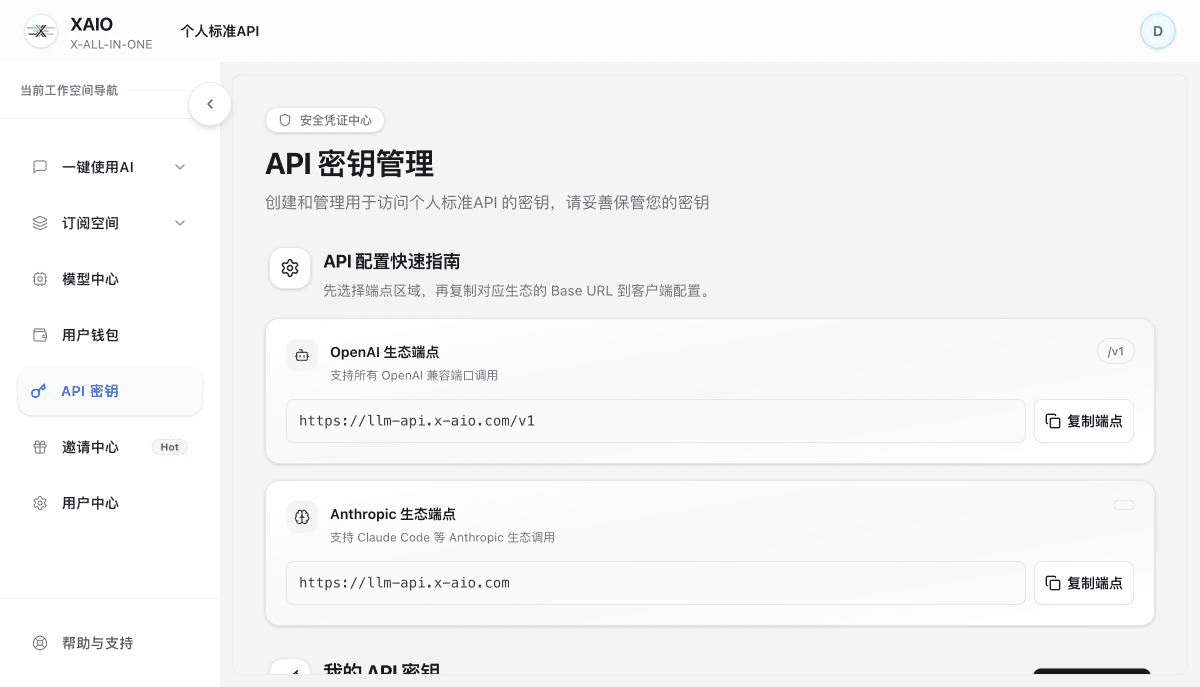
-
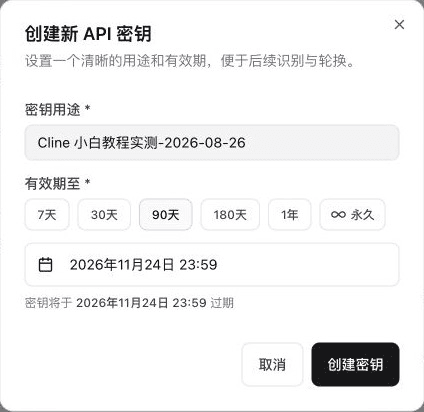
Click Create New Key.
-
Enter an easy-to-recognize name under Key Purpose, such as
Cline-Date. -
Select 90 days for the expiration period, then click Create Key.
-
Return to the key list and click the copy button in the row for the new key.
Do not copy the masked text
Click the copy button in the key's row to copy the complete key. Do not copy masked text such as sk-xxxx...xxxx from the page. Paste the complete key only into Cline's API Key field, and do not put it in chats, code, screenshots, or a Git repository. When you no longer need the test key, delete it from X-AIO.
3. Add the key to Cline
-
Click the Cline icon in the VS Code Activity Bar.
-
In the first-run wizard, select Bring my own API key. If you already skipped the wizard, click the gear icon at the top of the Cline panel to open Settings.
-
You do not need to widen the Cline sidebar. Use the copy button in the upper-right corner of the following code block, then paste the complete address into
Base URL:https://llm-api.x-aio.com/v1 -
Complete the remaining fields as follows:
| Cline field | Value to enter or select |
|---|---|
| API Provider | OpenAI Compatible |
| Base URL | https://llm-api.x-aio.com/v1 |
| OpenAI Compatible API Key | Paste the complete X-AIO key you just created |
| Model ID | Select kimi-k2.7-code from the drop-down list |
Enter the base URL only through /v1. Do not append /chat/completions or enter /v1/v1.
The model name must be lowercase
Enter the correct base URL and API key first. After a few seconds, the Model ID field becomes a drop-down list. Select kimi-k2.7-code from the list instead of typing a name with different capitalization. If the list does not appear, stop and check the key and base URL before continuing.
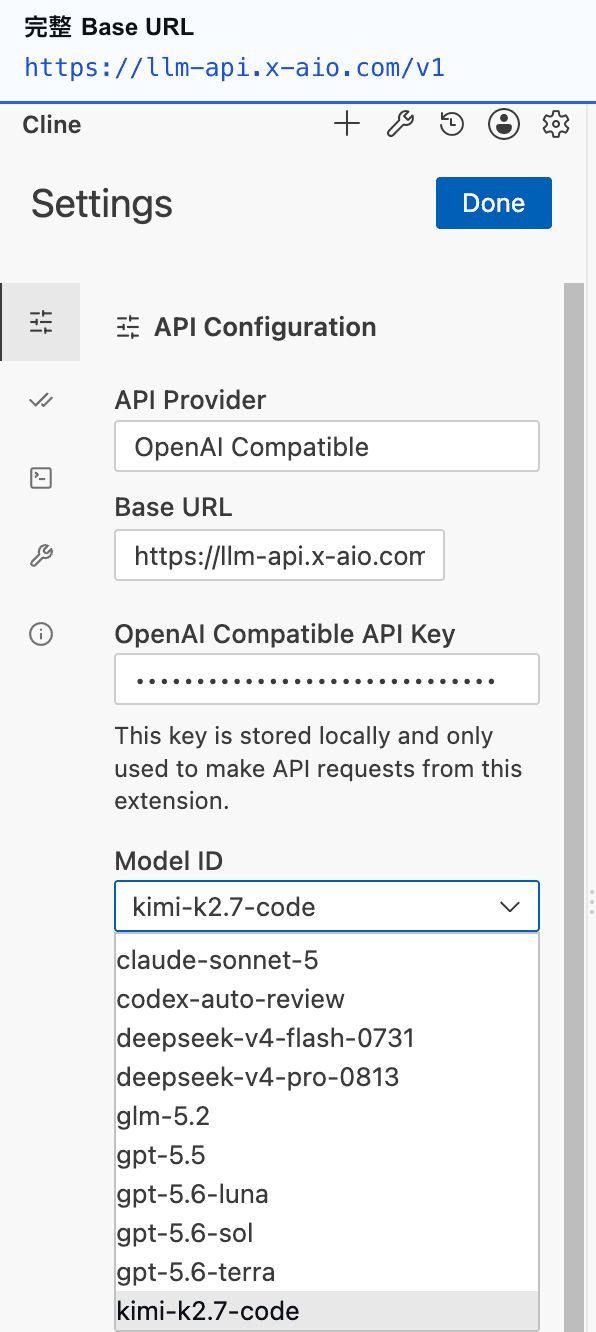
A narrow sidebar may show only part of the address in the input field. This is normal and does not mean the trailing /v1 is missing. The screenshot also labels the complete address to paste. After the model list appears, verify that the selected ID is the all-lowercase kimi-k2.7-code.
In the first-run wizard, click Continue. If you opened Settings directly, click Done in the upper-right corner. Add Header adds another request header; it is not a save button, and a standard X-AIO configuration does not require it.
4. Send your first test message
Click + at the top of the Cline panel (its tooltip reads New Task), keep the default mode, and enter:
Reply with exactly one sentence: Cline connected successfully.
Do not read or modify files, and do not run any commands.
If Cline replies with Cline connected successfully., the API key, base URL, and model are working. This test does not require reading files, modifying files, or running commands. Reject any permission request for those actions.
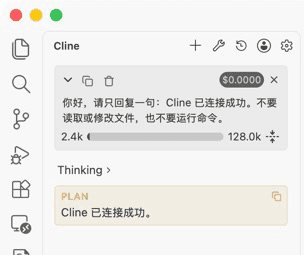
Setup is now complete. You can gradually try coding tasks in a test project, checking the path and contents before approving any file or command operation.
Troubleshooting
| Symptom | Resolution |
|---|---|
401, Unauthorized, or Invalid API Key | Return to the target key's row and click the copy button again. Check whether the key has expired and whether you copied masked text. |
402, insufficient credits, or insufficient balance | Check your credits in the Tokens Plan Subscription Overview. Resolve the credit issue, wait for the update to sync, then retry in a new Cline task. |
404 or endpoint not found | The base URL must be https://llm-api.x-aio.com/v1. Do not append another path or repeat /v1. |
No drop-down list under Model ID | Recheck the complete key and base URL, wait a few seconds, and reopen Settings. Do not manually enter a model name with different capitalization. |
| The request times out or keeps spinning | Check the network, credits, and model status, then retry with the short test message from this guide. To view logs, open View -> Output -> Cline. |
Official references: Cline website · Cline documentation · Cline GitHub repository · Visual Studio Marketplace