
Cherry Studio
Install Cherry Studio on macOS and connect models through X-AIO with one click.
Cherry Studio is a desktop client that supports multi-model chat, knowledge bases, translation, and AI image generation. Designed for first-time users, this guide uses macOS (Apple silicon) and Cherry Studio 2.0.9 to walk through installation, connecting X-AIO, adding a model, and starting your first chat, all on one page.
Windows users should download the Windows installer from the official website and follow the prompts to complete the installation. Button locations may vary slightly between Windows, macOS, and different Cherry Studio versions, but the overall process for connecting a provider, adding a model, and starting a chat is the same.
Before you begin
Sign in to X-AIO Tokens Plan in Chrome first. This guide will never display or ask for your complete API key. Do not send your key to anyone or include it in screenshots, chats, or code repositories.
1. Download and install Cherry Studio (macOS)
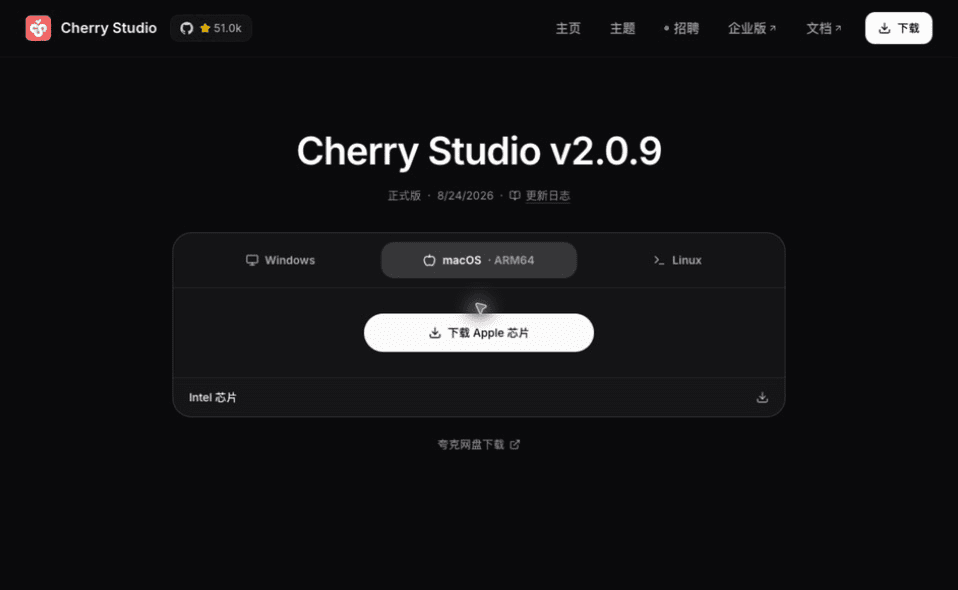
Open the Cherry Studio website, go to the download page, and select the version that matches your Mac:
- For an Apple M-series chip, select macOS · ARM64.
- For an Intel chip, select Intel chip.
The download button retrieves the installer from Cherry Studio's GitHub Releases page. This is expected.
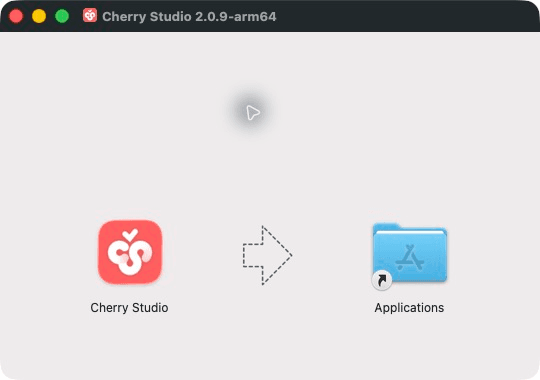
When the download finishes, double-click the .dmg file. In the window that opens, drag the Cherry Studio icon to the Applications folder.
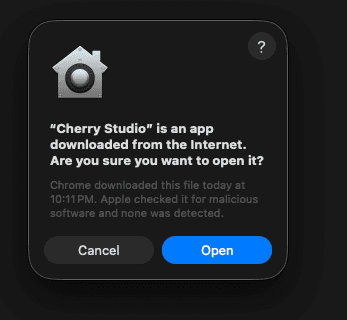
Launch Cherry Studio from Applications for the first time. When the standard macOS prompt warns that the app was downloaded from the internet, verify the app name and click Open.
Installation note
The image above shows the standard macOS first-launch prompt. If the system says the app is damaged or the developer cannot be verified, stop the installation and download the latest version again from the Cherry Studio website. Do not disable Gatekeeper or bypass macOS security checks.
2. Complete the first launch and switch to English
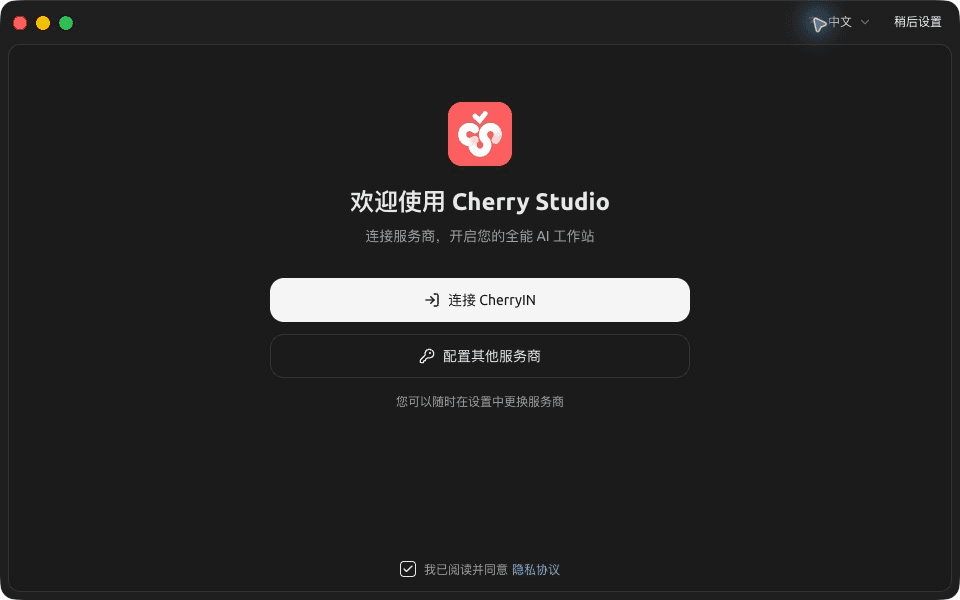
- Open the language menu in the upper-right corner and select English. Skip this step if the interface is already in English.
- Read the privacy agreement at the bottom and decide whether to accept it. If you want to continue, select the checkbox yourself.
- Click Configure other providers to enter Cherry Studio.
3. Create an X-AIO API key
Open the X-AIO API Keys page, click Create API Key, and complete the following settings:
- Enter a recognizable name, such as
Cherry Studio - Mac. - Choose an appropriate expiration period. This guide uses 90 days as an example. Avoid creating a permanent key for a temporary device.
- Click Create Key.
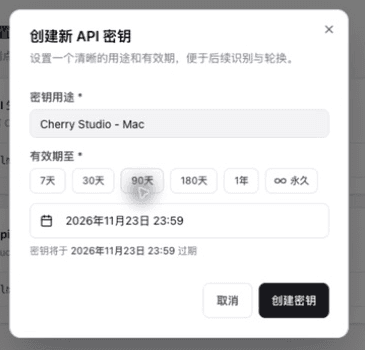
You do not need to paste the key into documentation or a chat after creating it. Continue by using the one-click connection option in the dashboard.
4. Connect Cherry Studio with one click
Find the action area on the right side of the key card you just created, then follow these steps:
- Click the Connect Client button on the far right, represented by a branching icon.
- In the expanded menu, click Connect Cherry Studio.
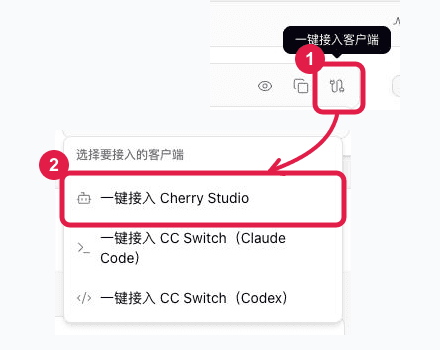
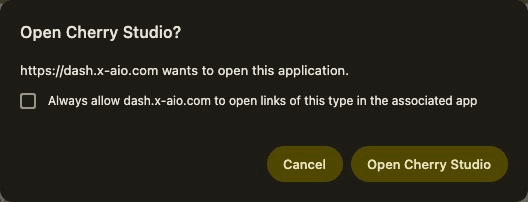
When Chrome asks "Open Cherry Studio?", click Open Cherry Studio. You do not need to select "Always allow."
Cherry Studio will display an import confirmation window. Verify the following information:
- Provider name:
X-AIO Tokens Plan - Provider ID:
xaio-v2 - Base URL:
https://llm-api.x-aio.com/v1 - API key: Keep it hidden; do not click the eye icon to reveal it
After confirming the details, click Add.
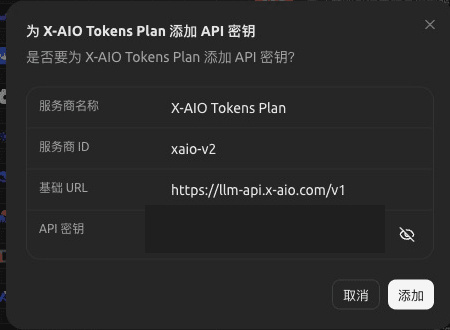
When you see a message confirming that the API key was added to X-AIO Tokens Plan, the import is complete. If the provider toggle in the upper-right corner is off, turn it on.
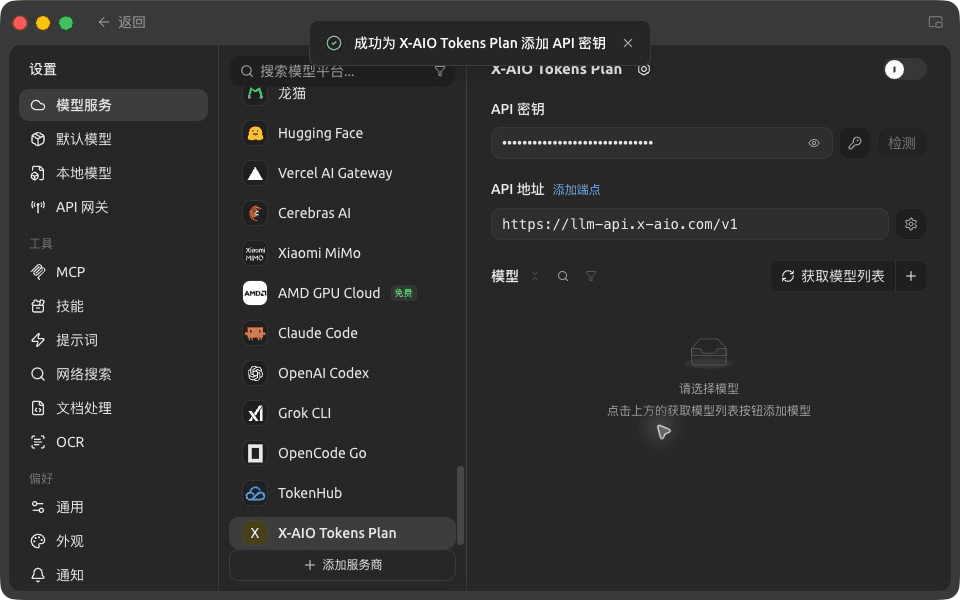
5. Retrieve the list and add an example model
After importing the provider, you still need to add the model you want to use in Cherry Studio:
- Go to Settings → Model Services → X-AIO Tokens Plan and click Get Model List.
- Search for
deepseek-v4-flash-0731in the model window. - Find DeepSeek V4 Flash (0731) and click the + on the right side of its row.
- The model has been added when the button changes to − and the row turns green. You do not need to add every model at once.
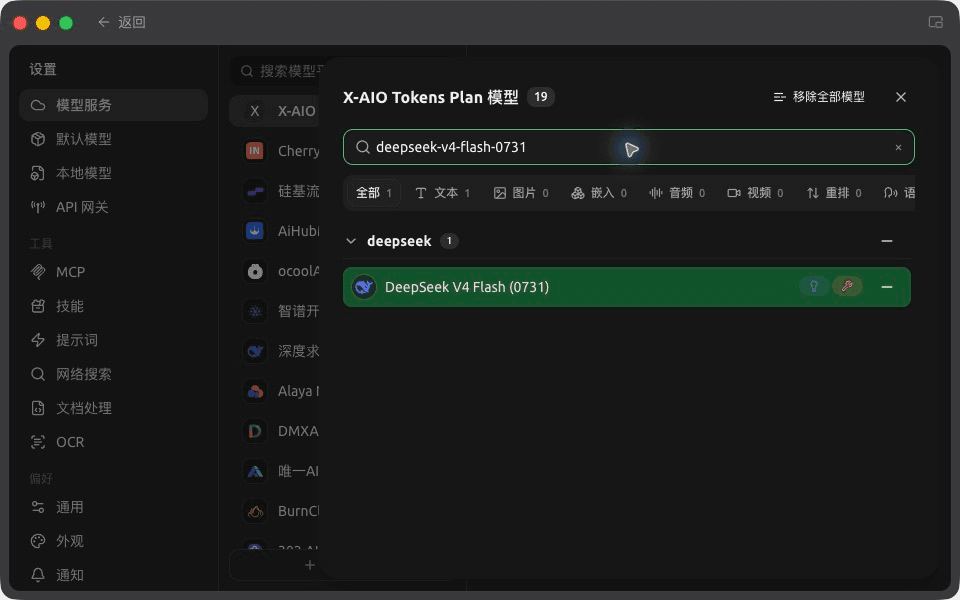
Can't find the model
The platform updates its model list over time. If the example model does not appear, click Get Model List again and confirm that the provider toggle is on. deepseek-v4-flash-0731 is used only as an example; refer to the live lists in the dashboard and client for currently available models.
6. Select the model and start chatting
- Click Back in the upper-left corner to return to the chat page.
- Click the model name at the top of the chat.
- Under X-AIO Tokens Plan, select DeepSeek V4 Flash (0731).
When DeepSeek V4 Flash (0731) appears at the top of the chat, the current conversation is using the example model.
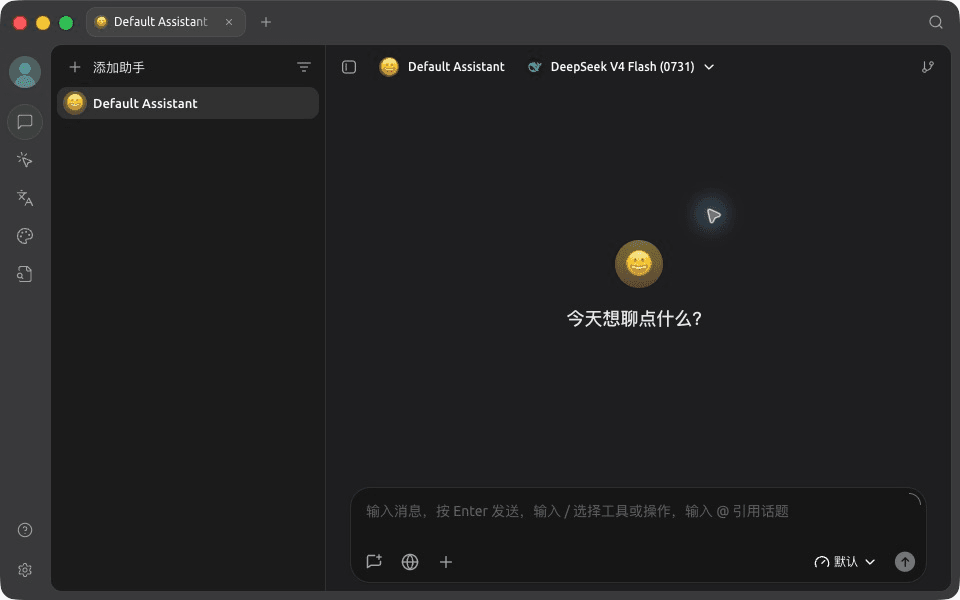
Send a simple message in the input box, for example:
Hello. Please introduce yourself in one sentence.After the model responds, the API key, provider, model, and network connection are all configured successfully.
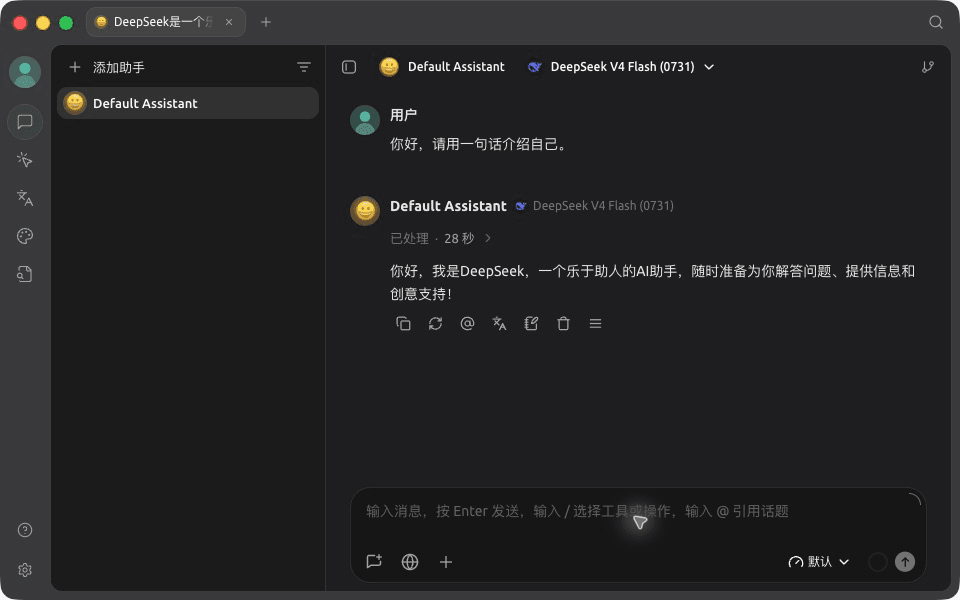
Troubleshooting
Cherry Studio does not open after I use the one-click connection
Confirm that Cherry Studio is installed and has been launched at least once. Then return to Chrome and click Connect Cherry Studio again. When the browser displays the external application prompt, click Open Cherry Studio.
The import succeeded, but there is no model on the chat page
Importing a provider does not automatically add a model. Return to Settings → Model Services → X-AIO Tokens Plan, click Get Model List, search for the model, and then click the + on the right.
The API key is reported as invalid or expired
Go to the X-AIO API Keys page and check the key's status and expiration date. To replace it, create a new key and repeat the one-click connection process. Disable old keys in the dashboard as soon as you no longer use them.
The model takes a long time to respond
Confirm that DeepSeek V4 Flash (0731) is selected at the top of the chat, then check the provider toggle, your network connection, and your available account balance. Response times vary with network conditions and current demand.
Manual configuration (fallback)
Only if the one-click connection is unavailable, manually add an OpenAI-compatible provider under Settings → Model Services:
| Setting | Value |
|---|---|
| Provider name | X-AIO Tokens Plan |
| API URL | https://llm-api.x-aio.com/v1 |
| API key | An API key created in the X-AIO dashboard |
After saving, follow Section 5 to retrieve the model list and add deepseek-v4-flash-0731. Keep the key masked while entering it, and never capture or share the complete key.